Low‑voltage wiring runs many of the systems we rely on every day — security cameras, access control, data networks, and home automation. Small faults in those circuits often cause outsized headaches. This guide explains what low‑voltage wiring is, why issues such as voltage drop, poor terminations, or wrong cable choice tend to recur, and practical troubleshooting steps that isolate the real cause.
What Are the Common Low Voltage Wiring Problems in Homes and Businesses?
Problems show up when cables, connections, or the system design can’t deliver the required voltage, bandwidth, or signal quality. Most failures fall into four categories: excessive voltage drop from long runs or undersized conductors, high resistance from poor terminations, physical or environmental damage to cable, and incorrect cable type or routing that creates crosstalk and data errors.
The most common low‑voltage wiring problems include:
- Voltage drop that causes dimming, device malfunctions, or reboot loops on cameras and LED lighting.
- Poor terminations and loose connectors that produce intermittent faults and localized heating.
- Physical cable damage (pinched, crushed, or chewed) that severs conductors or exposes insulation, inviting shorts.
- Incorrect cable selection or routing that leads to crosstalk, packet loss, or reduced PoE delivery.
Which Faulty Wiring Symptoms Indicate Low Voltage Issues?
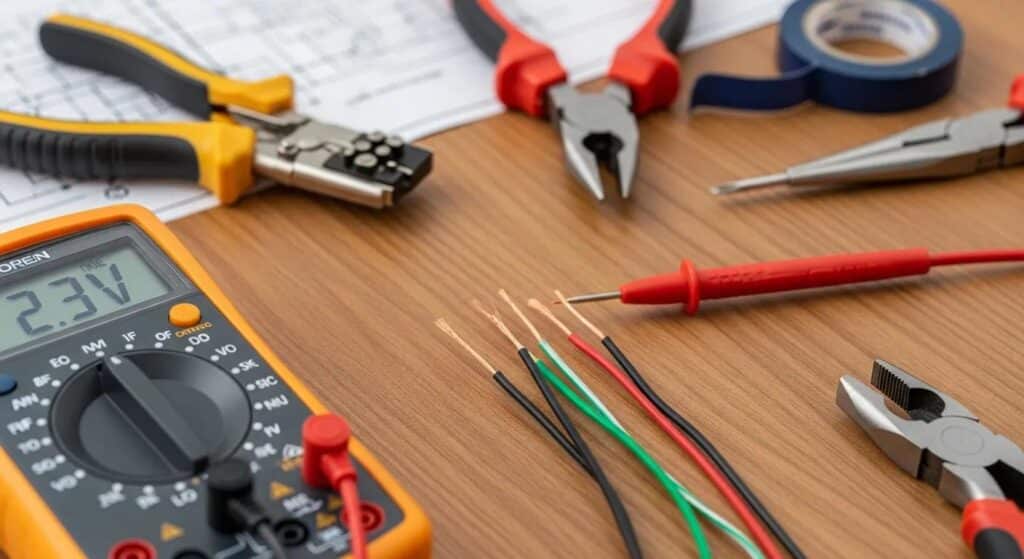
Symptoms help separate wiring faults from device or configuration problems. Look for flickering or dim LEDs, cameras that drop image or reboot, intermittent network drops on PoE switches, unreliable access control, and connectors that run hot. A visual check for frayed insulation or pinched runs often reveals physical causes; measuring voltage at the device under load confirms voltage drop. If problems persist, a qualified technician using a multimeter or cable certifier can pinpoint the root cause.
How Do Environmental Factors Affect Low Voltage Wiring Reliability?
The environment has a big impact on low‑voltage cable life and performance. Temperature swings, moisture, rodents, UV exposure, and electromagnetic interference accelerate wear and create failures. Attic and exterior runs face higher heat and UV exposure that degrade jackets and raise conductor resistance. Damp locations and outdoor junctions can corrode terminations. And nearby heavy electrical equipment can introduce EMI that interferes with data signaling.
Practical prevention includes choosing the right jacket material, using outdoor‑ or plenum‑rated cable where required, protecting runs in conduit, and avoiding high‑heat or high‑EMI paths. Moisture‑resistant enclosures, rodent guards, and routing decisions that match the environment reduce failures and make maintenance simpler.
Why Does Voltage Drop Occur in Low Voltage Electrical Systems?
Voltage drop is the loss of voltage between the power source and the load caused by conductor resistance and current flow. Low‑voltage devices often have tight operating windows, so even small drops can cause failures. Ohm’s law explains it: V = I × R — the longer the run and the thinner the conductor, the higher the resistance and the greater the drop. Corroded or loose connections add resistance locally, and multiple devices on the same run increase total current and the resulting drop, causing undervoltage, brownouts, or excessive heat.
Calculating expected drop helps decide when to upsize conductors, shorten runs, or add local power sources.
The table below compares common low‑voltage scenarios to estimate voltage drop for camera, door strike, and LED lighting runs (illustrative values for copper conductors and steady DC current). Use these figures to decide when to change gauge or add power supplies.
| Run Scenario | Typical Load | Approx. Expected Voltage Drop (12V system) |
|---|---|---|
| 12V camera, 50 ft, 18 AWG | 500 mA | ~0.6 V |
| 12V camera, 100 ft, 16 AWG | 500 mA | ~0.8 V |
| LED strip, 20 ft, 14 AWG | 1.5 A | ~0.9 V |
Longer runs and higher current raise drop; using a lower AWG (thicker wire) or moving power closer to the device reduces loss.
What Causes Voltage Drop and How Does Wire Gauge Influence It?
Wire gauge (AWG) sets a conductor’s cross‑sectional area and its resistance per foot. Lower AWG numbers mean thicker wire and lower resistance, which reduces voltage drop. For 12V cameras, PoE devices, and other low‑voltage loads, picking the right gauge for the run length and current is essential — even a one‑volt drop on a 12V circuit can cause device instability. Proper gauge choices prevent marginal behavior and cut heat at poor terminations.
How Can Circuit Overload and Poor Connections Lead to Voltage Drop?
Circuit overload happens when multiple devices draw more current than the supply was sized for, increasing voltage drop. This is common with daisy‑chained PoE devices or several LED strips on one feed. Poor connections — loose terminals, corroded splices, or bad crimps — add local resistance, generate heat, and magnify voltage loss, producing intermittent operation. Examples include sporadic door strike operation or PoE cameras that reboot. Diagnose by measuring voltage under load, inspecting terminations, and redistributing loads or replacing faulty connectors to restore system reliability.
Cost of Low Voltage Electrical Services
The table below gives estimated price ranges for common low‑voltage services. Actual costs depend on job complexity, materials, and local labor rates — use these figures to plan your budget.
| Service Type | Description | Price Range (USD) |
|---|---|---|
| Security System Installation | Installation of cameras, alarms, and monitoring systems | $500 – $1,500+ |
| Home Automation Setup | Integration of smart devices for home control | $300 – $1,200+ |
| Data Cabling | Installation of structured cabling for networks | $200 – $1,000+ |
| Telecommunications Wiring | Setup of phone and internet wiring systems | $150 – $800+ |
| Maintenance and Troubleshooting | Diagnostic services and repairs for existing systems | $100 – $500+ |
Understanding these ranges helps you make informed choices. Always consult a licensed professional for an accurate estimate tailored to your project. What Are the Challenges and Solutions for Structured Cabling Issues?
Structured cabling failures usually come from installation mistakes, mismatched cable types, or insufficient testing, and they show up as packet loss, slow throughput, or failed certification. Common root causes include bad terminations, exceeding bend radius, untwisting pairs too far, and wrong cable selection. The cure is disciplined installation, correct cable choice, and certification testing to TIA/EIA‑568 standards.
Pick cable based on bandwidth needs, environmental exposure, and run length; testing and certification validate performance and catch installation errors. The table below compares common cable types:
| Cable Type | Max Bandwidth | Recommended Max Run | Common Failure Modes |
|---|---|---|---|
| Cat5e | 1 Gbps | 100 meters | Crosstalk, poor terminations |
| Cat6 | 1–10 Gbps (short runs) | 100 meters (1G) | Alien crosstalk, tight bends |
| Cat6a | 10 Gbps | 100 meters | Poor shielding, untwisted pairs |
| Fiber (single-mode) | 10+ Gbps | Several kilometers | Connector contamination, bending loss |
This side‑by‑side view clarifies tradeoffs and underscores that selecting the right cable and testing it are the best defenses against installation errors.
How Does Improper Installation Affect Structured Cabling Performance?

Poor installation reduces link margin and raises error rates, leading to intermittent connections, slower throughput, and failed certifications. Excessive untwisting, tight bends, and sloppy patch‑panel dressing introduce return loss and crosstalk that damage signal integrity. A disciplined installation checklist — keep the pair twist to the termination point, honor bend radius, label runs, and use tidy patch‑panel layouts — prevents these issues. Always follow up with visual and certification tests to verify performance and cut down on troubleshooting later.
What Best Practices Prevent Common Structured Cabling Problems?
Following TIA/EIA‑568 practices, documenting runs, and consistent cable management stops most structured cabling failures. Key steps: choose the right cable type, keep pair twist intact to termination, maintain bend radius and separation from power, perform end‑to‑end certification testing, and label both ends for easier maintenance. Regular inspections and keeping test records create a baseline for future troubleshooting and reduce downtime.
Recurring Low-Voltage Wiring Problems: Causes and Fixes
Licensed low‑voltage electricians bring knowledge of code, grounding, safe termination methods, and proper power distribution. Pros diagnose interactions like voltage drop under load, PoE power budgeting, and NEC Article 725 considerations, then apply fixes such as upsizing conductors, relocating power supplies, reterminating connectors, and performing cabling certification. Hiring a licensed electrician lowers safety and insurance risks, keeps work code‑compliant, and usually means fewer callbacks.
Why Is Licensed Electrician Expertise Crucial for Low Voltage Wiring Safety?
Licensed electricians know the legal and safety frameworks that govern electrical and low‑voltage systems and ensure installations meet relevant codes such as NEC Article 725. Noncompliant work can create hazards or void insurance. Professionals are trained in safe testing, correct grounding and bonding, and in recognizing when low‑voltage work must be separated from mains work. Using a licensed electrician reduces safety risk, guarantees professional‑grade terminations, and provides the documentation needed for long‑term maintenance and insurance.
What Are the Benefits of Choosing Rewired Iowa for Low Voltage Services?
Rewired Iowa is a local team of licensed electricians in Des Moines focused on dependable low‑voltage installations for homes and businesses. We handle security alarms, home automation, telecom, and data cabling — from new installs to troubleshooting and maintenance. Our work emphasizes careful installation, solid grounding, structured cabling best practices, and practical knowledge of Central Iowa conditions to deliver reliable systems that need fewer service calls. We prioritize first‑pass testing, clear documentation, and installations that meet code to minimize recurring faults.
Ready for Reliable Low-Voltage Solutions?
Don’t let wiring problems disrupt your home or business. Contact Rewired Iowa for expert installation, troubleshooting, and maintenance services.
How to Troubleshoot and Prevent Low Voltage Electrical Wiring Problems?
Good troubleshooting follows a safe, repeatable workflow: start with visual and safety checks, measure voltage under load, verify continuity, test data links and PoE, and use certification tools when needed. Preventive habits include neat cable management, correct termination techniques, scheduled inspections, and keeping records. The numbered steps below give a reliable path for diagnosing most issues:
- Safety First: De‑energize circuits when possible and wear appropriate PPE.
- Visual Inspection: Check for physical damage, corrosion, loose connectors, or moisture intrusion.
- Measure Under Load: Use a multimeter to compare voltage at the source and at the device while it’s operating.
- Check Terminations: Inspect and, if qualified, re‑crimp or tighten suspect terminations.
- Test Data Links: Run a cable tester or certifier for continuity, wiremap, and performance.
- Redistribute Loads: If the supply is overloaded, spread devices to other feeds or upgrade the power source.
- Document and Retest: Record findings, make fixes, and retest to confirm the issue is resolved.
The table below matches common symptoms to likely causes and practical DIY or professional checks:
| Symptom | Likely Cause(s) | Professional Fix / DIY Check Steps |
|---|---|---|
| Camera reboots intermittently | Voltage drop, poor PoE supply, loose connector | DIY: measure voltage under load; Pro: verify PoE budget, replace patch cable or switch port |
| Flickering LED lighting | Undersized transformer, long run, loose connection | DIY: check connections; Pro: calculate drop and upsize wire or move the power source |
| Network errors or slow throughput | Improper termination, crosstalk, EMI | DIY: confirm cable routing away from power; Pro: certify cable and reterminate |
| Hot connector or trim | High resistance at termination | DIY: visual inspect; Pro: replace connector and verify torque/crimp standards |
If measurements show significant voltage loss or certification fails, contact a licensed professional for remediation.
What Are Step-by-Step Methods for Diagnosing Low Voltage Wiring Issues?
Start with safety verification, then layer tests from simple to advanced. Confirm the site is safe, do a visual inspection for damage or moisture, then measure voltage at source and endpoint both unloaded and under typical load. Use a continuity tester for open or shorted conductors, and a cable certifier for structured links to measure insertion loss, NEXT, and return loss. For PoE issues, check switch port power allocation and budgets. Document every step and retest after each change — a systematic approach reduces guesswork and speeds reliable repairs.
How Can Proper Cable Management and Termination Improve System Reliability?
Neat cable management and correct terminations reduce mechanical stress, preserve pair twist and shielding, and make future troubleshooting faster and less error‑prone. Good practices include labeled patch panels, color‑coded runs, adequate service loops, cable trays or conduit, and maintaining separation between power and data to limit EMI. Termination best practices mean using the right connectors, limiting untwist to the manufacturer’s recommendation, and certifying links to validate performance.
Frequently Asked Questions
What is the difference between low voltage and high voltage wiring?
Low‑voltage wiring typically operates at 50 volts or less and is used for systems like security, data, and certain lighting. High‑voltage wiring operates above 50 volts and carries household or building power. The distinction matters for safety and code compliance.
How can I tell if my low voltage wiring is damaged?
Damaged low‑voltage wiring often shows up as flickering lights, intermittent device behavior, or total device failure. A visual inspection may reveal frayed insulation or pinched cables. Measuring voltage under load can confirm voltage drop. If problems continue, call a licensed electrician.
Can I perform low voltage wiring repairs myself?
Simple repairs — swapping a damaged connector or replacing a visible section of cable — can be DIY for confident homeowners. Complex issues involving code compliance, grounding, or detailed troubleshooting should be left to licensed electricians. Know your limits and call a pro when safety or certification is required.
What are the common causes of low voltage wiring failures?
Typical causes include voltage drop from long runs or undersized conductors, poor terminations, physical damage, incorrect cable choice, and environmental stresses like moisture and temperature swings. Identifying the likely cause speeds the right fix.
What should I do if my low voltage system keeps failing?
Start with a visual check for damage or loose connections and measure voltage at the source and device under load. If these checks don’t fix the issue, consult a licensed electrician — persistent failures usually require professional diagnostics and remediation.
Key Takeaways
- Low-voltage systems power essential daily functions like security, data, and home automation.
- Common problems include voltage drop, poor terminations, physical damage, and incorrect cable selection.
- Environmental factors (temperature, moisture, EMI) significantly impact wiring reliability.
- Proper installation, regular maintenance, and professional expertise are crucial for preventing recurring issues.
- Systematic troubleshooting involves visual checks, voltage measurements, and data link testing.
John Senn is a licensed Master Electrician based in Des Moines, Iowa with over 20 years of hands‑on experience serving homes and businesses across the state. He specializes in electrical panel upgrades, whole‑home generator installations, EV charger setups, and 24‑hour emergency service. As the owner of a growing team of certified electricians, John has built a reputation for safe, code‑compliant work and practical solutions that keep Iowa families and businesses powered up. His deep knowledge of Iowa’s electrical codes and his commitment to ongoing training make him a trusted voice in the trade and a go‑to expert for reliable electrical work in Des Moines and beyond.