
Smoke & CO Alarm Battery Replacement: Safe Step-by-Step Guide
Fresh batteries keep smoke and carbon monoxide (CO) alarms ready to warn your household — and that simple habit protects lives and property. This guide walks homeowners and building managers through identifying detector types, picking the right battery, safely replacing cells in both battery-only and hardwired units, and testing and troubleshooting common problems. You’ll find NFPA 72 inspection checkpoints, clear step‑by‑step instructions for both detector styles, CO-specific checks on placement and lifespan, and guidance on when it’s time to replace the whole unit. If you’d rather have a professional handle hardwired systems or tricky diagnostics, Rewired Iowa’s smoke detector installation service — a family-owned Des Moines electrical company with licensed electricians, 24/7 availability, and a 5‑Year Workmanship Guarantee — can help. Read on for practical steps, quick-reference tables, and safety-first tips to keep your alarms working the way they should.
Why Is Regular Battery Replacement Crucial for Smoke and Carbon Monoxide Detectors?
Regular battery replacement makes sure detectors can do their one job: sense danger and alert people quickly. When batteries fail, alarms can lose power or act intermittently, which raises the chance of delayed warnings during a fire or a CO event. Replacing batteries on schedule and testing monthly shortens the window when a detector might not work, and it helps confirm that interconnected systems (if you have them) will notify the whole home. Keeping batteries fresh and replacing units at their end‑of‑life follows NFPA 72 guidance and supports code‑aware maintenance under recent NEC 2023 updates.
What Are the Fire and Carbon Monoxide Risks of Dead Batteries?
If a detector’s batteries die, you lose the earliest possible alert that gives people time to escape or ventilate. Working smoke alarms save lives by giving that early warning; a dead alarm removes that margin. Carbon monoxide is colorless and odorless — without a powered CO detector, occupants can’t tell when CO levels become dangerous. That’s why routine battery care is a low-effort step with a big impact on reducing injuries and property loss when detectors are the primary warning system.
What Do NFPA 72 and Local Iowa Codes Recommend for Battery Maintenance?
NFPA 72 calls for monthly testing of detectors and timely battery replacement on units with replaceable batteries — commonly every six months or per the manufacturer’s guidance — while sealed 10‑year lithium units are replaced at end‑of‑life. Local practice matters, too: Iowa’s adoption of updated electrical codes and NEC 2023 highlights that hardwired and interconnected systems should be installed and serviced to current standards by qualified professionals. Following NFPA 72’s testing cadence and changing batteries at the first low‑battery alert aligns you with best practices and helps ensure compliance if a professional inspects your system.
NFPA 72 Battery Testing for Fire Alarms
NFPA 72 specifies tests for different battery types used in alarm systems.
Reference: Fire Alarm Systems: Inspection, Testing, 2003
How Do You Identify Your Detector Type and Battery Requirements?
Knowing whether your detector is battery‑only, hardwired with battery backup, or a sealed 10‑year unit tells you whether a simple battery swap is possible or if you should call a pro. Battery‑only units usually have a removable cover and a visible battery compartment. Hardwired units are tied to the home’s wiring and often hide a small backup battery behind the mounting plate. Sealed 10‑year units are labeled with a manufacture or expiry date and are meant to be replaced at end‑of‑life, not serviced. Correct identification helps you pick the right battery chemistry and avoid unnecessary electrical work — or the need for professional electrical installation services.
What Is the Difference Between Battery-Only and Hardwired Smoke Detectors?
Battery‑only detectors run solely on user‑replaceable batteries and are the easiest to maintain — a good choice for renters or simple retrofits. Hardwired detectors connect to your house power and usually include a battery backup; many are interconnected so one alarm triggers the rest. Because hardwired units are tied into building wiring, you should be careful when disconnecting them and consider a licensed electrician for any work that goes beyond swapping an accessible backup battery. Knowing the difference helps you decide whether it’s a DIY job or one to hand off to a pro.
Which Battery Types Are Common: 9V, AA, and 10-Year Lithium?
Detectors accept different battery chemistries, each with trade‑offs in lifespan and maintenance. Common options are replaceable 9V batteries (often in older smoke alarms), AA batteries (common in some modern smoke or CO units), and sealed 10‑year lithium cells in newer combination detectors that remove routine battery chores.
Use the table below for a quick comparison of typical battery types, expected lifespan, and which detectors they suit best.
| Detector Type | Battery Type | Typical Lifespan / Recommendation |
|---|---|---|
| Battery-only smoke detector | 9V alkaline or AA | Replace batteries every 6 months; test monthly |
| Battery-backup hardwired detector | AA or 9V backup | Swap backup battery every 6–12 months; test monthly |
| Sealed 10-year detector | 10‑year lithium (sealed) | Replace the entire unit at end‑of‑life (check manufacture/expiry date) |
Short version: sealed lithium units cut down maintenance but need whole‑unit replacement when they expire; replaceable cells require a regular schedule to stay reliable.
What Are the Step-by-Step Instructions to Replace Smoke Detector Batteries?
Replacing batteries safely is mostly about preparing, using the correct battery, handling the detector carefully, and testing afterward. Think of it as a simple but important home maintenance task.
Start by gathering your tools, testing the alarm, and using safe ladder practices for ceiling units. For battery‑only detectors, remove the cover, note battery orientation, swap in the correct cells, close the compartment, and press the test button to confirm operation. For hardwired systems, isolate the circuit before touching wiring or mounting plates — if you’re unsure which breaker controls the detector, stop and contact our electrical installation team.
Before you start, collect the items below and consider reading our short primer for homeowners: Electricians in Des Moines: What to expect in your home.
| Tool or Supply | Purpose | Notes |
|---|---|---|
| Ladder or step stool | Safe access to ceiling units | Ensure stable footing and have someone spot you |
| Screwdriver (flat/phillips) | Remove mounting or battery compartment | Match the screw head to avoid stripping |
| Replacement batteries | Power the detector | Use the manufacturer‑recommended type (9V/AA/10‑year lithium) |
| Soft cloth or canned air | Clean dust from sensor and contacts | Avoid harsh chemicals around sensor elements |
| Voltage tester (optional) | Confirm power-off for hardwired units | Use when working on hardwired detectors for safety |
This checklist helps you stay organized and reduces mistakes during replacement.
How Do You Safely Disconnect Power for Hardwired Smoke Alarms?
To work on hardwired alarms, switch off the correct breaker at the service panel and verify power is off with a non‑contact voltage tester or the detector’s power indicator. Remove the detector from its mounting bracket and look for a plug‑in wiring harness — many units use a connector you can separate without exposing live wires. If you can’t identify the correct breaker or the harness isn’t obvious, stop and call a licensed electrician. Working on live line conductors risks shock or damage. Remember: for interconnected systems, turning off one circuit may affect multiple devices, so confirm the whole system is de-energized before proceeding.
What Tools and Supplies Are Needed for Battery Replacement?
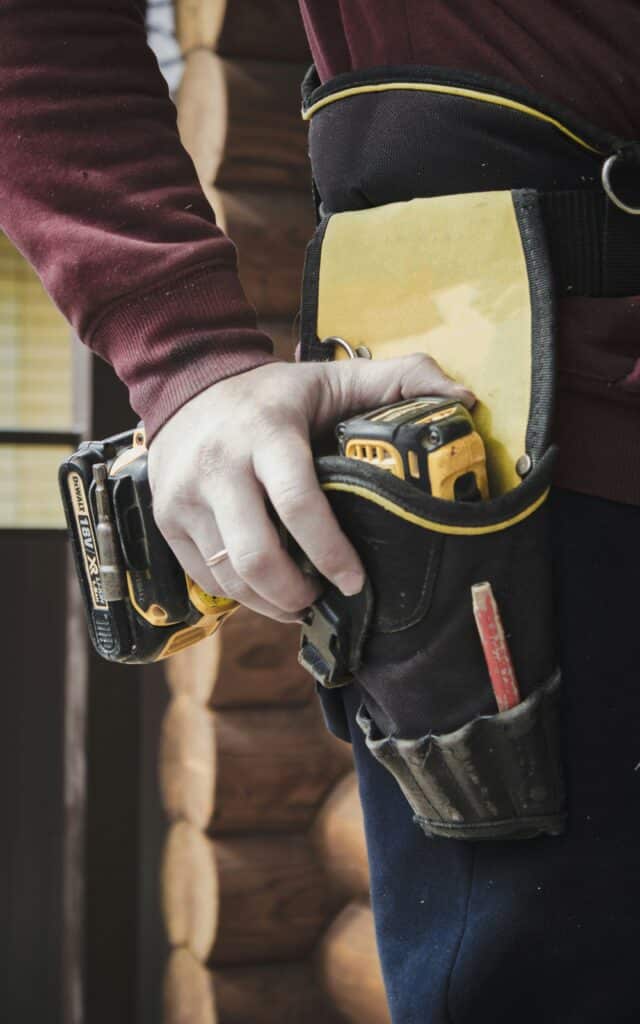
Keep a small kit handy: a stable ladder, the right replacement batteries, a screwdriver for secured units, and a soft cloth to clear dust from sensor openings. For hardwired jobs, add a non‑contact voltage tester and insulated gloves to lower electrical risk. Store old batteries in a sealed container for proper disposal and use reputable battery brands to avoid premature failures — and check our safety and code updates for the latest guidance.
Essential items and why they matter:
- Ladder or step stool — safe access to ceiling‑mounted units.
- Correct replacement batteries — match the detector’s specs.
- Screwdriver — to release mounting plates or battery compartments.
- Non‑contact voltage tester — confirm power‑off on hardwired systems.
- Soft cloth or canned air — clean sensors and contacts before testing.
With supplies ready, you’re set for the mechanical replacement steps below.
How Do You Access, Remove, and Insert New Batteries Correctly?
Follow the manufacturer’s instructions to open the battery compartment or remove the detector from its mount. Note the polarity markings before removing the old battery. Inspect the contacts for corrosion or debris and clean them gently with a soft cloth if needed. Insert the new battery with the correct orientation, press it into place so the compartment closes securely, and reseat the detector on its mounting plate if applicable. Don’t mix old and new batteries — that can cause voltage imbalances and early failure — and dispose of spent batteries properly.
How Do You Test Your Smoke Detector After Battery Replacement?
Always test the alarm after replacing batteries. Press and hold the test button for the time the manufacturer recommends (usually several seconds) and listen for a loud, sustained tone. If your alarms are interconnected, verify that other units sound as well. If the alarm fails the test, recheck battery seating and polarity, clean contacts, and test again. If it still won’t sound, the sensor or wiring may be bad — replace the unit or call a professional. Record the battery change date and plan monthly tests per NFPA 72 guidance.
How Do You Replace Batteries in Carbon Monoxide Detectors?
CO detectors follow many of the same maintenance steps as smoke alarms but have different testing methods, sensor lifespans, and placement rules. CO units commonly use AA or specialized batteries and should be tested using the manufacturer’s CO test procedure (not just the general alarm test), since CO sensors detect gas levels, not smoke particles. When you change CO batteries, check the manufacture or expiry date and confirm placement near sleeping areas and levels with fuel‑burning appliances for best protection. Treat CO maintenance as both a power check and a device‑life check.
What Are the Specific Battery Replacement Steps for CO Detectors?
Remove the CO unit from its mount or open the battery compartment, note polarity and battery type, swap in the manufacturer‑recommended cells, and run the device’s CO test sequence or press the test button to verify proper response — some CO alarms use a distinct chirp or spoken test message. If the CO detector is hardwired, follow the same safe power‑isolation steps used for smoke alarms before accessing internal batteries. If the unit doesn’t respond after correct battery installation, replace the detector or seek professional inspection.
How Do You Check CO Detector Lifespan and Placement During Replacement?
While changing CO batteries, read the manufacture or expiry label to find the sensor’s recommended replacement interval — many CO sensors last 5–10 years. Follow placement best practices: put CO detectors near bedrooms and on each level with fuel‑burning appliances, but avoid placing them right next to stoves or vents that can trigger nuisance readings. Make sure vents around the sensor are clear of dust, note the install or manufacture date, and move or replace units as needed to keep coverage effective.
The following table summarizes CO detector types, battery notes, and placement tips.
| CO Detector Type | Battery Type | Lifespan / Placement Notes |
|---|---|---|
| Portable plug-in CO detector | AA or built‑in cell | Check sensor date; place near bedrooms but away from kitchen steam |
| Battery-only wall/ceiling CO detector | AA alkaline | Replace batteries per schedule; test monthly |
| Hardwired CO detector with backup | AA or internal backup | Require professional handling for wiring; follow manufacturer placement guidance |
What Are Common Troubleshooting Tips for Detector Battery Issues?
Troubleshooting centers on quickly spotting common faults — chirping, intermittent failures, or false alarms — and taking simple fixes like reseating batteries, cleaning contacts, or replacing an old unit. Start by confirming the correct battery type and polarity, clean sensor openings, and press the test button. If problems persist, consider environmental causes (dust, humidity, steam) and replace the detector if self‑tests keep failing. For wiring issues or hardwired system problems, consult a licensed electrician to avoid hazards and make sure interconnected alarms work correctly.
Why Is My Smoke Detector Chirping After Battery Replacement?
A post‑replacement chirp often comes from incorrect battery orientation, poor contact seating, or a residual circuit condition that needs a reset. Remove and reinsert the battery, making sure polarity is correct and the battery is firmly seated; clean any corrosion on the contacts and hold the test button for several seconds to reset the unit. If it still chirps, try a fresh battery from a recommended brand and check the detector’s date — if it’s near end‑of‑life, replace the whole unit. Persistent chirps after these steps usually point to internal sensor or circuit faults and should prompt a professional visit from our installation team.
How Do You Handle Persistent False Alarms or Detector Malfunctions?
False alarms are often caused by environmental triggers like cooking smoke, steam, dust buildup, or placement too close to HVAC vents. Start by cleaning the detector’s exterior and sensor openings, then relocate units that repeatedly trigger. Test after cleaning to see if the problem stops; if random activations continue, the sensor may be degraded or wiring could be at fault in hardwired systems. For persistent or unexplained behavior in hardwired or interconnected alarms, schedule an inspection with our electrical troubleshooting and repair team. Note when and where each alarm went off — that information helps technicians diagnose recurring faults faster.
Reducing Nuisance Alarms: NFPA 72 Standards
Nuisance alarms are a common reason homeowners disable detectors. NFPA 72 and later updates call for household alarms installed near kitchens to be listed for resistance to common cooking sources, and for household alarms to be listed for resistance to common nuisances to reduce unnecessary activations.
Reference: Smoke alarm nuisance source characterization: review and recommendations, 2016
When Should You Replace the Entire Detector Instead of Just the Battery?
Replace the whole detector when it repeatedly fails after battery and contact checks, when it reaches the manufacturer’s end‑of‑life date, or if it fails the built‑in self‑test despite correct battery installation. Other reasons to swap the unit include visible sensor damage, ongoing false alarms that cleaning doesn’t fix, or when a smoke detector is more than about 10 years old (follow manufacturer guidance for CO sensors). Dispose of old detectors following local e‑waste rules. Replacing an aged or faulty unit restores reliable detection and reduces the chance of missed hazards.
If troubleshooting and DIY steps don’t resolve the issue, complex hardwired problems, persistent malfunctions, or questions about NEC 2023 compliance are best left to trained professionals. A licensed electrician can verify system‑wide interconnectivity and correct any wiring or code concerns — see our guide on electrical code corrections.
If you need professional assistance, consider Rewired Iowa as a local option:
- Rewired Iowa is a family‑owned electrical service based in Des Moines serving Central Iowa with 24/7 emergency and scheduled electrical help.
- Our licensed electricians install, inspect, and replace smoke alarms, fire alarms, and carbon monoxide detectors.
- We back our work with a 5‑Year Workmanship Guarantee and carry trust signals like 5‑star reviews and a BBB A+ rating to give you peace of mind for complex or hardwired systems.
How Can Rewired Iowa Help with Professional Detector Battery Replacement and Installation?
Rewired Iowa handles routine detector maintenance and complex hardwired installations with a focus on safety and code compliance. Our licensed electricians perform smoke and CO detector installation, full system replacements, and diagnostics on hardwired systems. With 24/7 availability, homeowners and businesses in Des Moines and Central Iowa can get emergency service when alarms act up. Our 5‑Year Workmanship Guarantee and strong local reviews give customers confidence that installations will hold up over time. Hiring a professional helps ensure work follows NFPA 72 testing practices and local code updates tied to NEC 2023 adoption.
What Professional Services Does Rewired Iowa Offer for Smoke and CO Detectors?
We offer inspection, replacement, and installation of smoke alarms, fire alarm systems, and carbon monoxide detectors — both scheduled and emergency calls. Our services include diagnostics for hardwired or interconnected systems, battery‑backup replacement, and placement recommendations to optimize coverage near sleeping areas and appliance zones. Licensed electricians evaluate system health and recommend repairs or full replacements when needed.
How Does Rewired Iowa Ensure NEC 2023 Code Compliance and Safety?
Our electricians follow current code guidance and industry best practices to align installations with local requirements and NEC 2023 updates. We verify circuit isolation before working on hardwired detectors, inspect interconnected wiring and mounts, and recommend products and placements that meet NFPA 72 testing and replacement guidance. Combining code‑aware inspections with practical maintenance helps reduce the risk of missed issues and improves overall safety.
What Are the Benefits of Choosing Rewired Iowa’s 5-Year Workmanship Guarantee?
Working with a contractor that stands behind their work gives homeowners measurable assurance. Rewired Iowa’s 5‑Year Workmanship Guarantee covers labor on installations and repairs, reducing unexpected follow‑up costs and providing peace of mind. Our family‑run approach and strong customer ratings add trust and accountability to every job.
- Workmanship Coverage: A five‑year warranty on labor for installations and repairs.
- Local Reputation: Family‑owned business with positive customer feedback.
- 24/7 Service: Emergency response options for urgent alarm failures.
Conclusion
Keeping batteries fresh in your smoke and CO detectors is a simple, low‑cost step that keeps these life‑saving devices ready when you need them. Follow the steps in this guide to reduce your risk of fire and CO incidents. If you’d rather have a pro handle hardwired systems, persistent problems, or code questions, Rewired Iowa offers local, licensed electricians who can install and maintain your detectors to professional standards. Protect your home — and if you need help, we’re here for you.
John Senn is a licensed Master Electrician based in Des Moines, Iowa with over 20 years of hands‑on experience serving homes and businesses across the state. He specializes in electrical panel upgrades, whole‑home generator installations, EV charger setups, and 24‑hour emergency service. As the owner of a growing team of certified electricians, John has built a reputation for safe, code‑compliant work and practical solutions that keep Iowa families and businesses powered up. His deep knowledge of Iowa’s electrical codes and his commitment to ongoing training make him a trusted voice in the trade and a go‑to expert for reliable electrical work in Des Moines and beyond.